
How To Create a 10k NFT Collection in 2022 (No Code)
Add a mint button to your website without a developer
Prefer Reading? 👇🏼
How Anyone Can Create a 10k NFT Collection in 2022 Without Code
Now you can have a mint button to your website without needing a developer
TOM HARRI
UPDATED JULY 29, 2022 11:25 AM EST


Launching an NFT collection used to require some serious coding skills.
And finding a good blockchain developer nowadays can be hard because their skills are in such hot demand…
But thanks to this new software out there, right now, you can create and launch an NFT collection without having to hire a developer or knowing how to code.
And you’re gonna wanna stay til the end to… because I am going to show you how you can add a mint button to your website so visitors can mint from you directly.
This way you don’t have to give-up a cut to list on the marketplace as a service fee
Now before we get in to I just have to make you aware that I am not a certified financial advisor therefore I don’t give financial advice.
Before we get started, you’ll need a digital wallet to launch the NFTs from.
I’m going to be using a Metamask wallet for this demonstration.
Metamask is one of the most popular digital wallet options out there.
Now if the concept of a digital wallet sounds confusing, just think of it like it’s your safe.
A safe to keep those precious .jpegs in…
Whatever wallet we launch the NFT collection from, this wallet will be the wallet with control over the smart contract in case we want to make some changes down the line.
No other wallet will be able to make those changes to this smart contract which is a unique distinction to understand about web3 compared to web2.
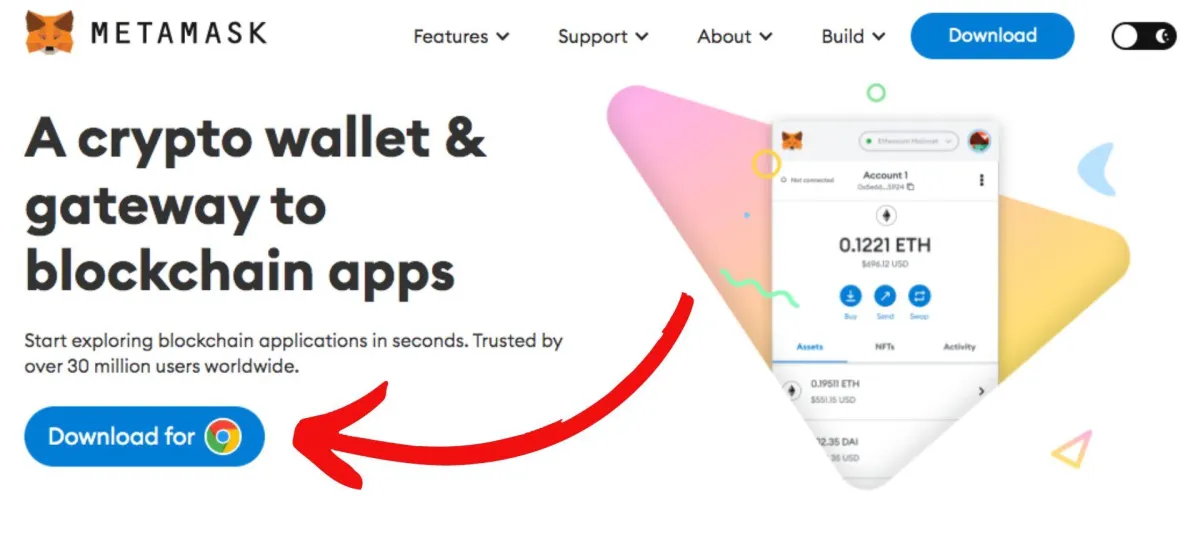
If you don’t yet have a Metamask wallet, that’s ok, you can download one for free
Just go to https://metamask.io/
Click download & install the browser extension for whatever browser you’re using
Metamask is one of the most popular digital wallets for crypto assets
The whole setup is pretty easy and the will walk you through step-by-step where you will eventually be given a seed phrase…
Under no circumstances should you ever share this seed phrase with anyone, especially strangers online…
Oftentimes bad actors pose as tech support online in an attempt to get you to divulge sensitive information.
This is call social engineering and these bad actors use psychological manipulation to get people to perform actions or divulge confidential information they otherwise normally wouldn’t..
So if someone ever asks for your seed phrase, that should raise an immediate red flag..
No matter how convincing or helpful they may try or appear to be.
Because just like how any person can open a safe with the right key, any person can open a digital wallet with the right seed phrase.
So your seed phrase is like the key to your safe so you’ll want to protect it.
That’s all the time im gonna spend on setting up a Metamask wallet because you’re here for NFTs.
If you need a more detailed Metamask wallet walkthrough, there are plenty of helpful videos out there.
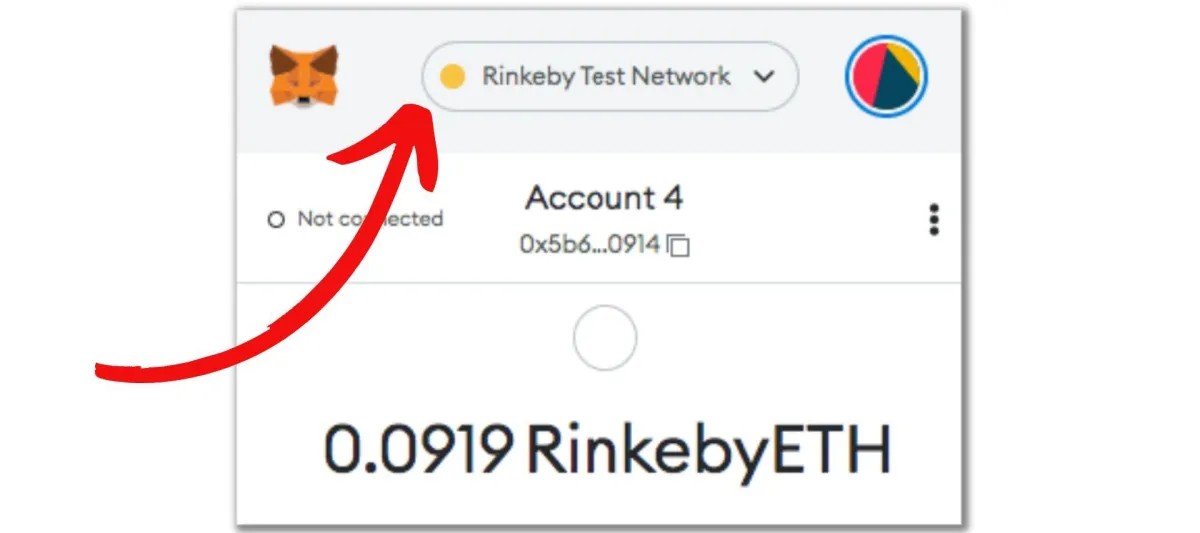
Once you have Metamask installed in your browser and your seed phrase is secured offline, next, switch the network to the Rinkeby Test Netork
Rinkeby is Ethereum’s test network.
With digital wallets, you can create sub-accounts (with different wallet addresses) all in one "wallet"
It’s a good idea to to do a practice NFT launch first on a test network, this way, you can make sure everything looks the way you want before launching to a main network paying gas fees.
This allows you to get some practice runs in too so you are comfortable with the platform functionalities before launching on the main net
Now before we begin, we need to get some test ETH for the Rinkeby test network.
Open your Metamask and copy your wallet’s address
I used this https://rinkebyfaucet.com/
Copy and paste your wallet address to to receive test ETH.
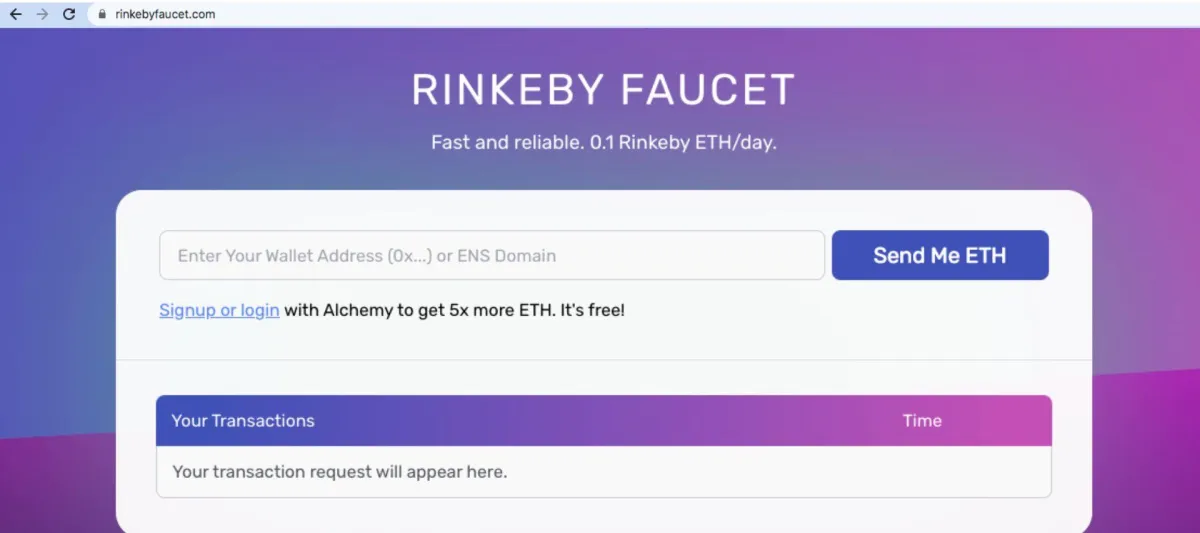
There are a couple ways to get Rinkeby ETH but this was the fastest that I found.
Once we have the test ETH we are ready to dive into Thirdweb the platform that allows you to launch an NFT collection without a developer.
We need these test tokens to pay gas fees to launch the NFT collection.
Thirdweb allows you to create Ethereum NFTs using their pre-built smart contracts.
When you use a pre-built contract on Thirdweb, you still retain ownership of the contract.
Thirdweb has no control over what you do and cannot modify, delete, or prevent you from using your contract once it’s deployed.
The advantage of using Thirdweb's pre-built smart contracts is that they’ve done the heavy lifting for you to build a trusted web3 app, including contract development, gas optimizations, auditing, and testing.
Another advantage of using Thirdweb is that they only deploy the parts of code you need.
When deploying code to the blockchain, deploying code costs money and more code means more money.
So what Thirdweb has done is basically trimmed down fat of the smart contracts and uses the bare minimum amount of code needed to save you money.
Thirdweb claims that this is why it’s around 10 times cheaper to deploy one of their pre-built smart contracts than it is to deploy a smart contract on your own.
So since you probably don’t want to dedicate the time to learn how to write gas-optimized smart contracts, and all that other stuff, I think Thirdweb is a solid option.
Oh, and I forgot to mention, it’s free to use, just pay gas.
Ok let’s begin.
Go to thirdweb.com and click Start Building
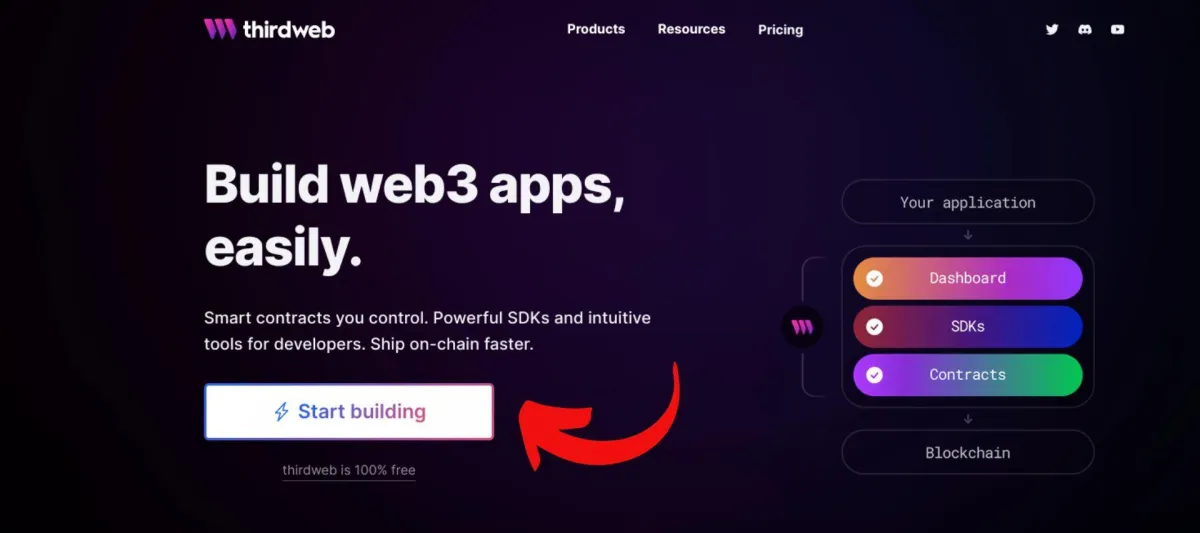
Thirdweb is straight forward with it's user friendly design.
Next connect to your Metamask wallet
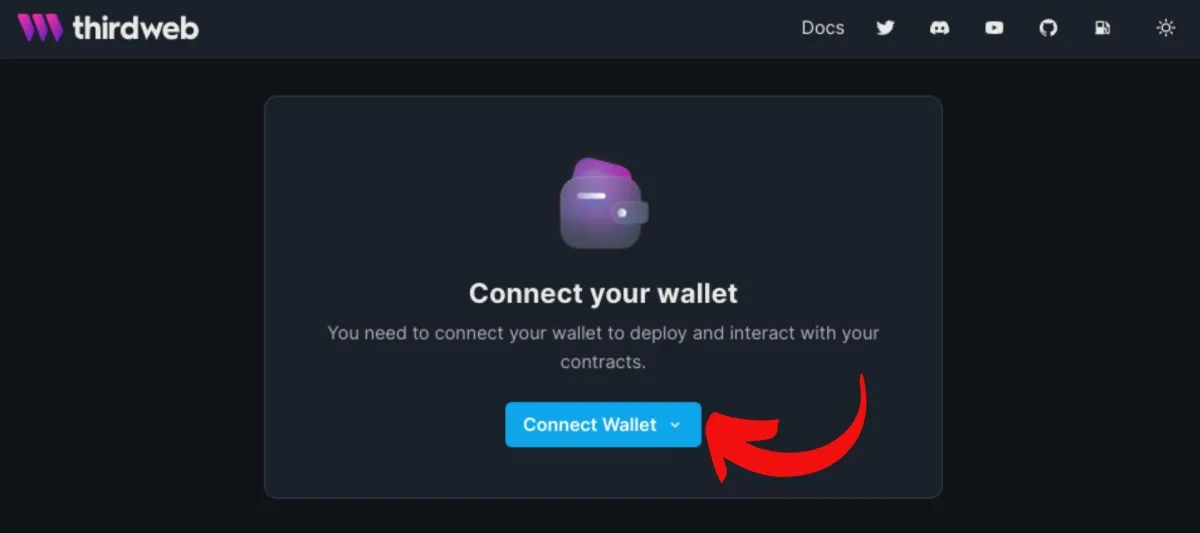
Connect Thirdweb with your Metamask wallet.
Click Pre-built contracts
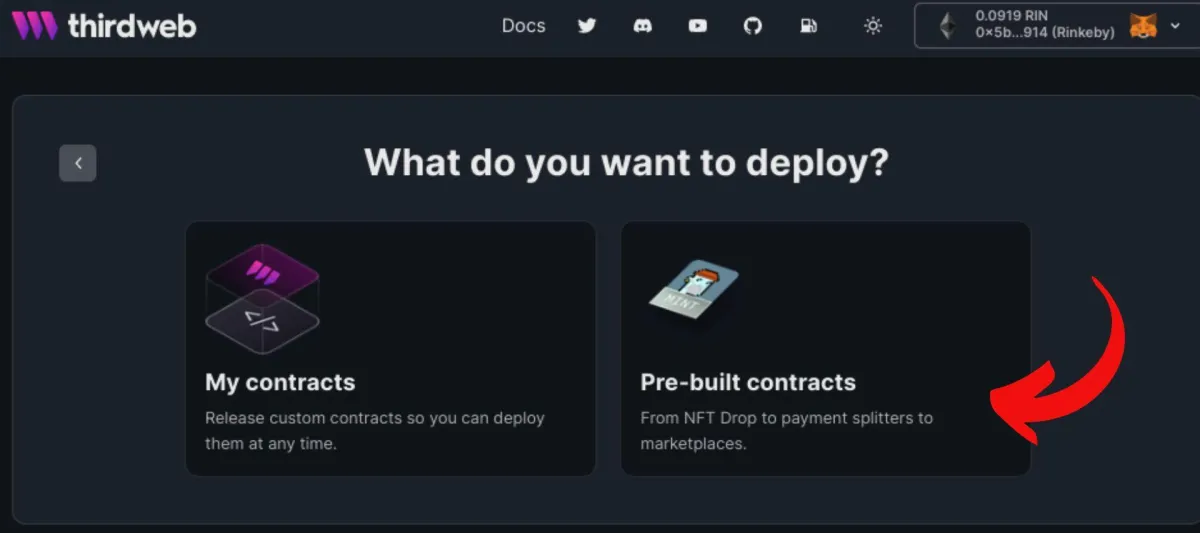
Prebuilt contracts leaves the technical stuff such as smart contract security & gas optimization to the tech people 🙏
From here you have a few options…
We are going to click Release a drop
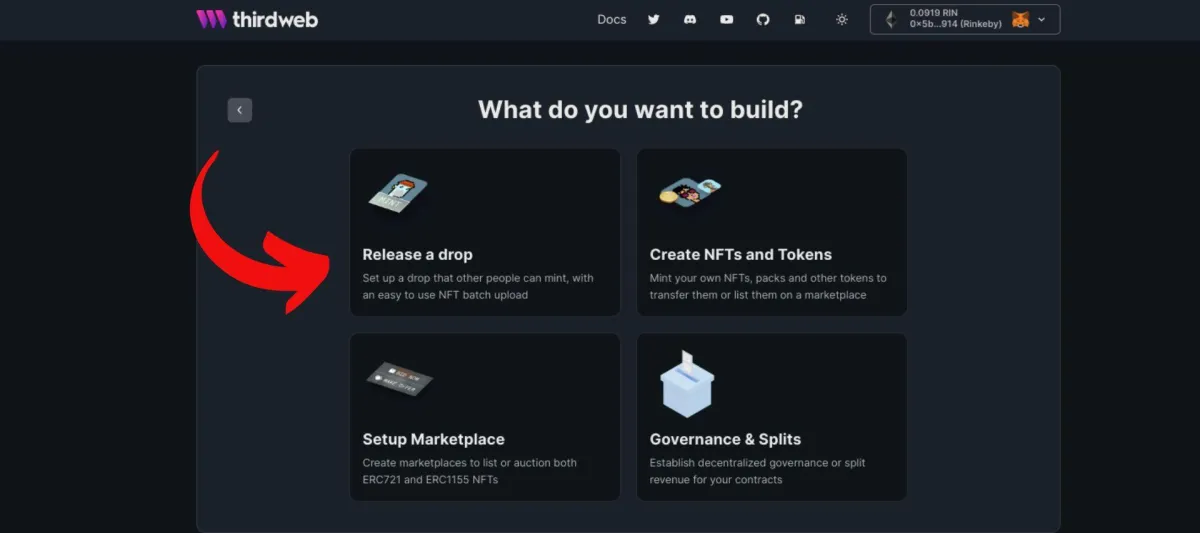
Thirdweb has a lot of capabilities when it comes to all things NFTs
We are going to click NFT Drop
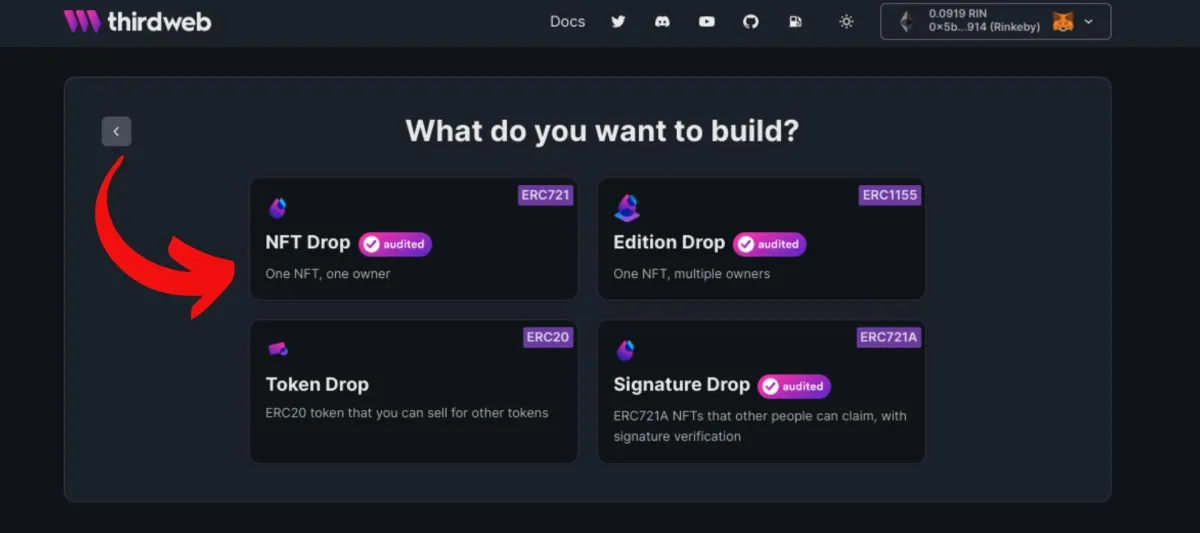
Thirdweb audits some of their smart contract too 👍
According to Thirdweb, The NFT Drop contract is best used when you want to release a 1-of-1 or 1-of-many NFT collection, such as a PFP (profile picture) collection, and uses the ERC721 Standard.
The NFT Drop contract allows you to define the conditions for when and how your users can mint an NFT, including allowlists, release dates, claim limits, and delayed reveals.
When you add NFTs to your drop contract, they are not minted at this point.
You prepare everything for your users so that they can mint the NFT(s). This means the user who claims the NFT is the one who mints it, and it is minted into their wallet.
By default, the user is the one who pays the gas fees.
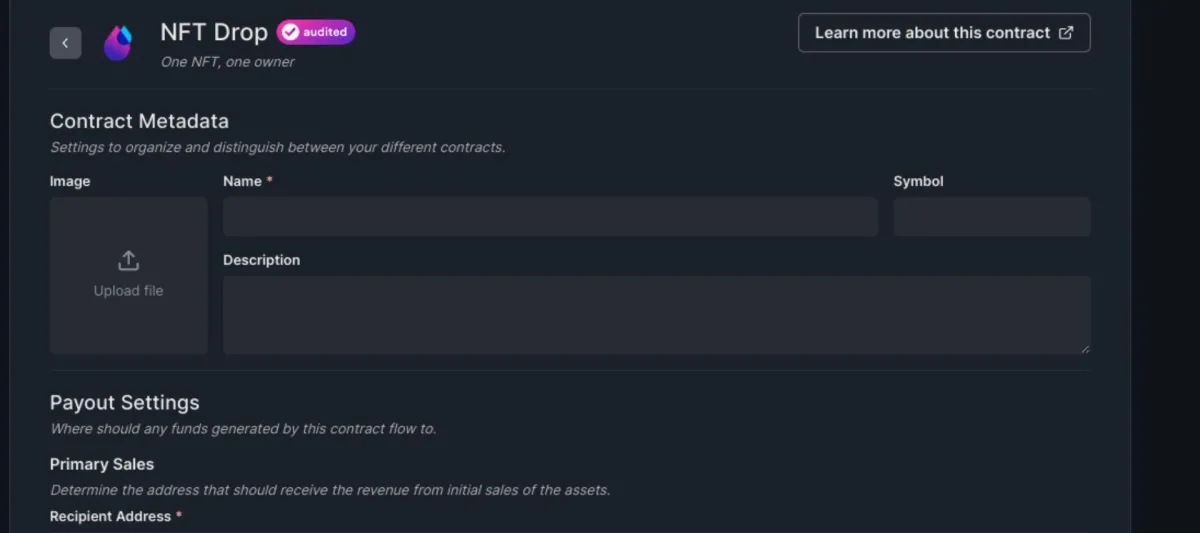
Next you’ll want to the upload the logo or branding for the NFT Drop.
EXAMPLE: This is what would appear on the Collections page on OpenSea (you can even use a GIF image if you want)
You will want to enter the name and the description of the NFT project.
You can also specify which wallet gets the proceeds from mint.
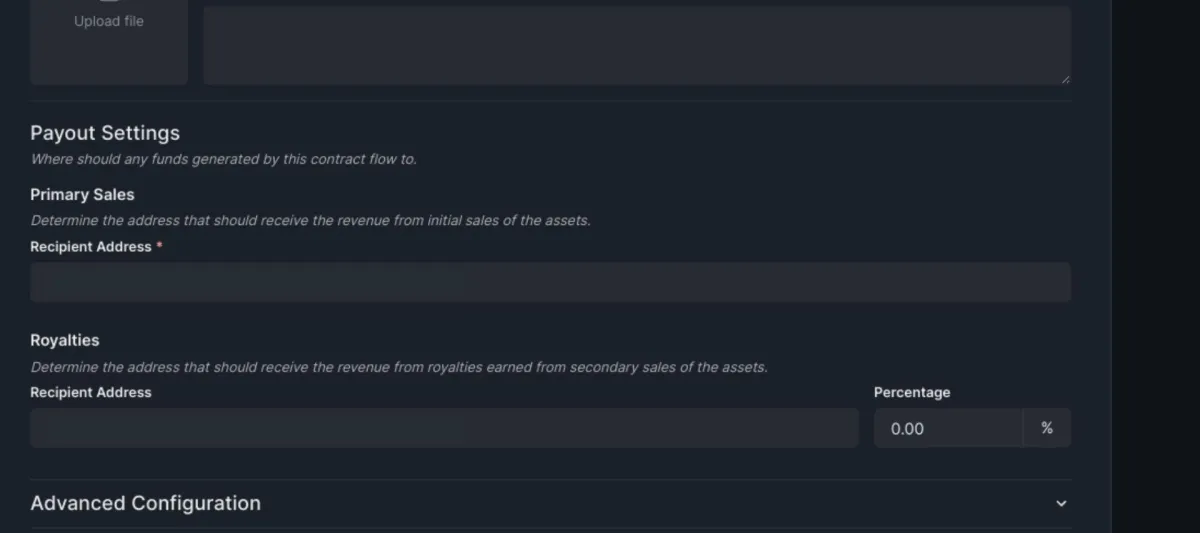
Specify where the sales from the mint should go and the wallet address for any secondary sales if collecting a royalty.
You can also set which wallet gets the royalties percentage (if any).
This is the percentage of sales you receive from any secondary sales.
These royalties are paid automatically thanks to smart contacts.
Here you can set the recipient’s wallet address to receive those funds
Click Deploy Now
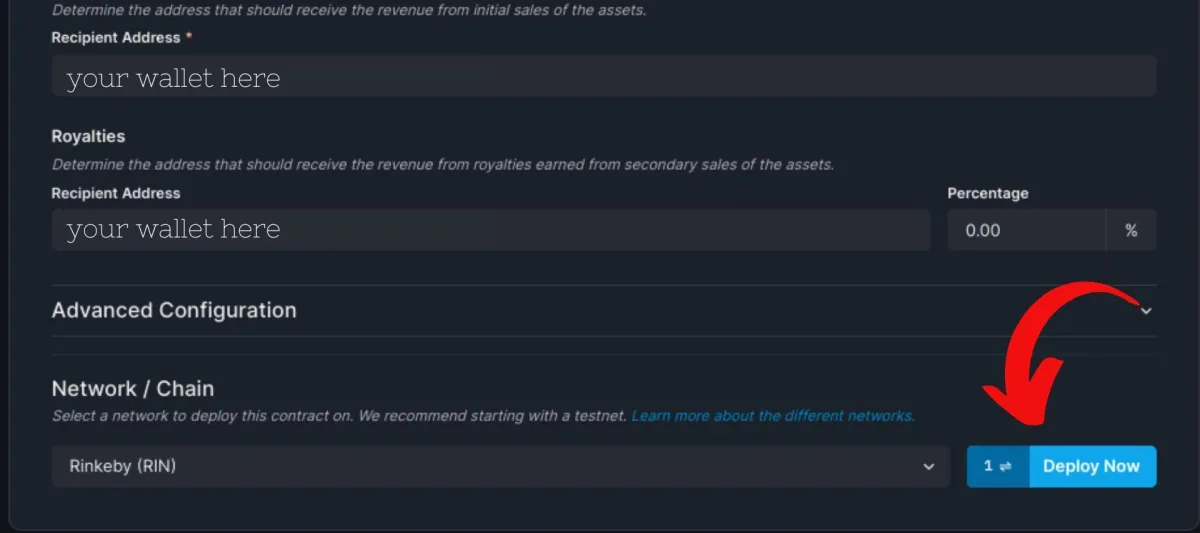
A cool thing with Thirdweb is that you have the flexibility to choose if you would like it to be the same wallet or a different wallet.
And don't worry you can change these settings later too,
Since we are just doing a demo, we are gonna stay on the testnet
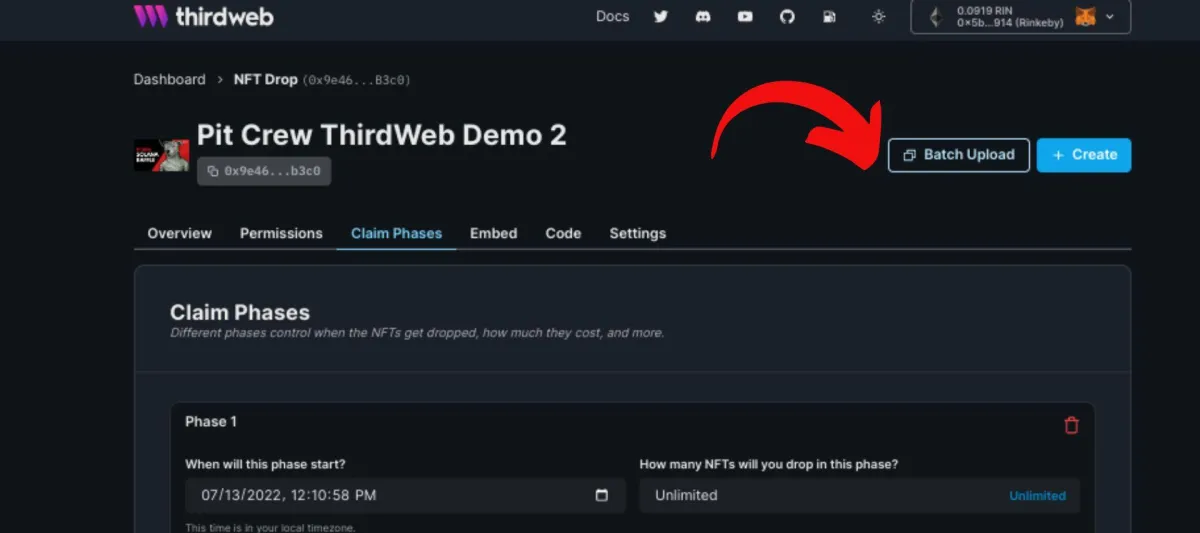
Next, you will want to set the claim phase for your NFTs.
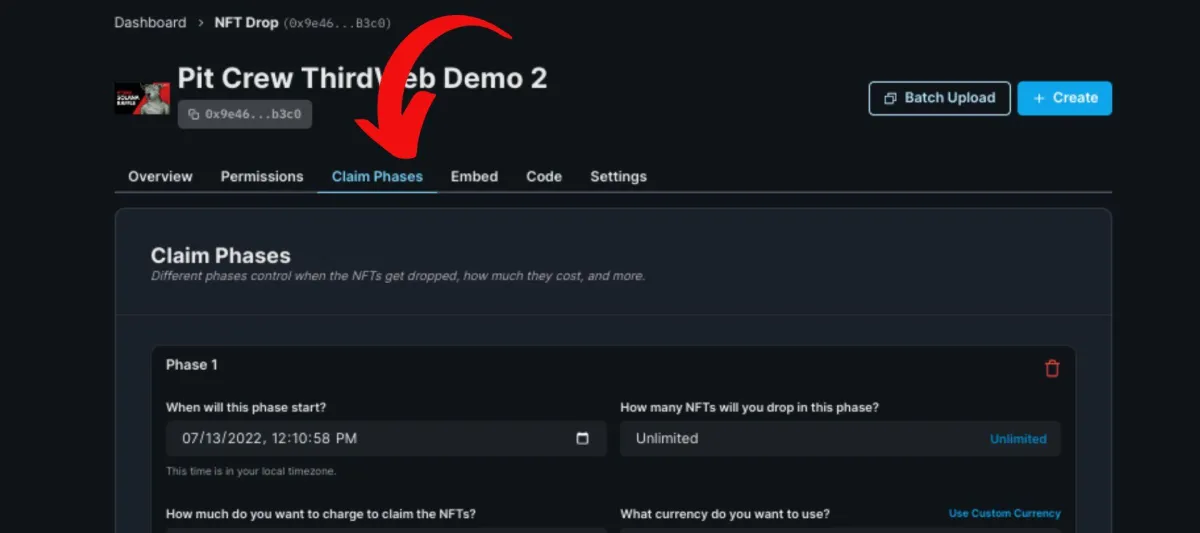
Claim Phases gives NFT creators flexibility on how they want their NFTs to be launched.
The Claim Phase allows you to control how you drop your NFTs.
You can choose to make the entire collection available at once or you can set a start time where you may only release a specified number of NFTs in a pre-sale launch strategy
You can set you price for each NFT and you can select which currency you want the price to be in.
Another cool thing about Thirdweb is that you can use a custom currency for the purchase of your NFTs, just specify the contract address for the currency you want to get paid in.
You can also specify who can claim NFTs during a phase… Maybe you have a whitelist of wallets that you want only to be able to claim your NFTs during this phase.
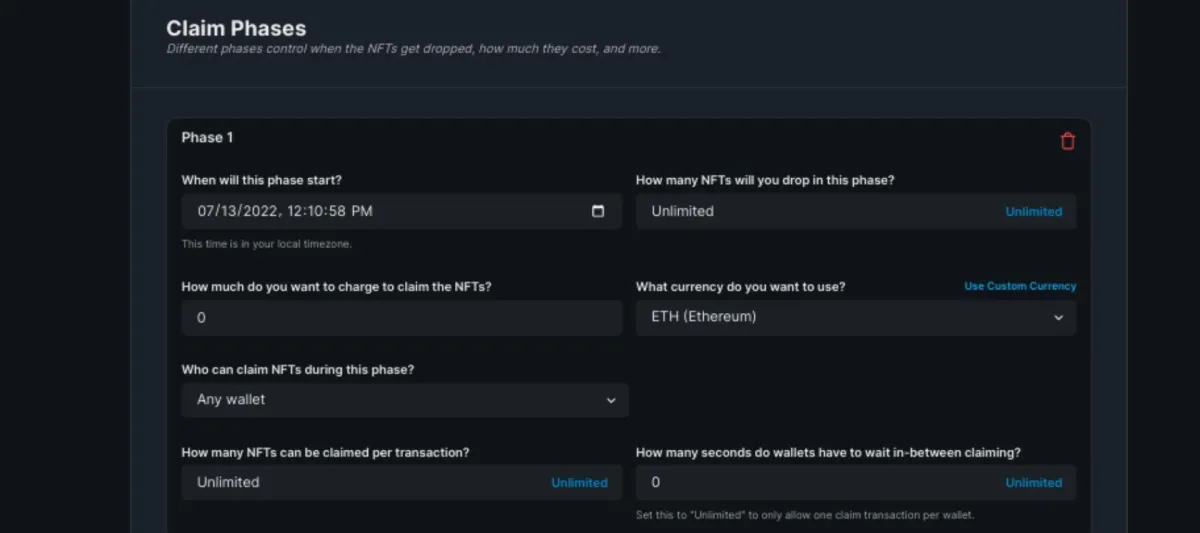
You can set a price for each NFT claim phase. You can also specify a whitelist or limit the number of NFTs per wallet address
If you click the drop down arrow you will get a prompt to add a .csv file with the specific wallet addresses for the whitelist.
Another feature you have control over is how many NFT can be claimed per transaction so if you want each wallet to only be able to purchase 1 NFT you would enter 1 and set “How many seconds do wallets have to wait in-between claiming?” to unlimited.
But for this example, lets just keep it simple… so I’ll set it to allow anyone to claim as many NFTs as they would like.
You also have the option to set an Additional Claim Phase if you would like to launch your collection in a series of waves, like wave 1, wave 2, etc.. While having control over the price
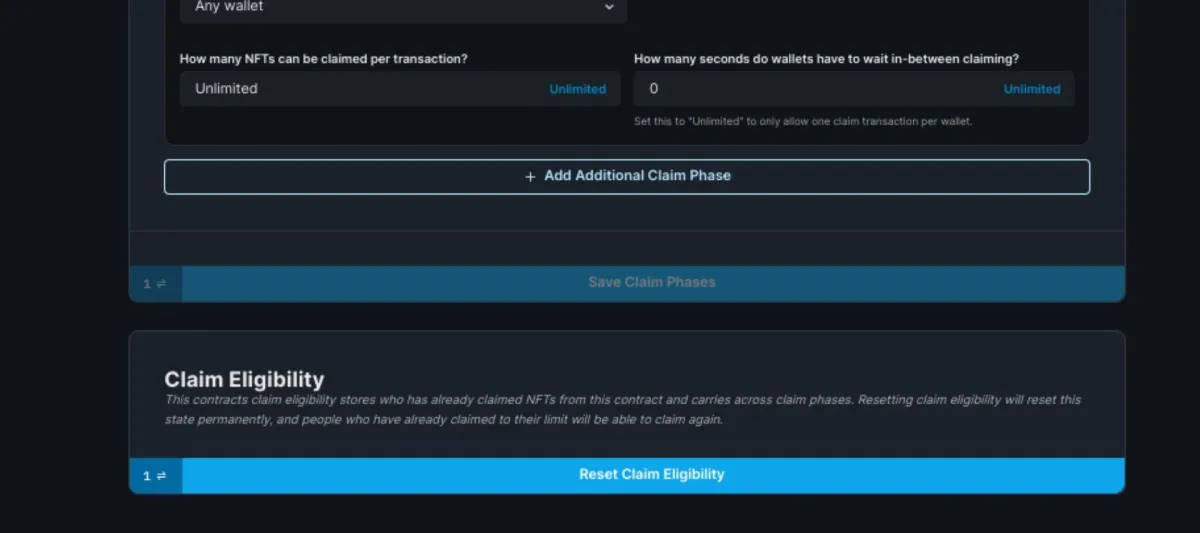
You can always come back and update this later if necessary but it will cost a small gas fee since you’re making a change to the smart contract.
Next we are gonna to batch upload our NFTs.
Once you have your art and metadata, you can upload them quickly here.
You could create each NFT 1-by-1 but that would probably bore us both to tears.
And instead Thirdweb has this useful batch upload feature where we can upload all our images and metadata in one fell swoop.
Just make sure your files are formatted correctly and if you are unsure there are example files from Thirdweb. You can also double check to make sure everything looks good.
For this demonstration, I already generated the layered images and metadata.
Thirdweb can accept json files or csv files just make sure they are formatted like in their example files…
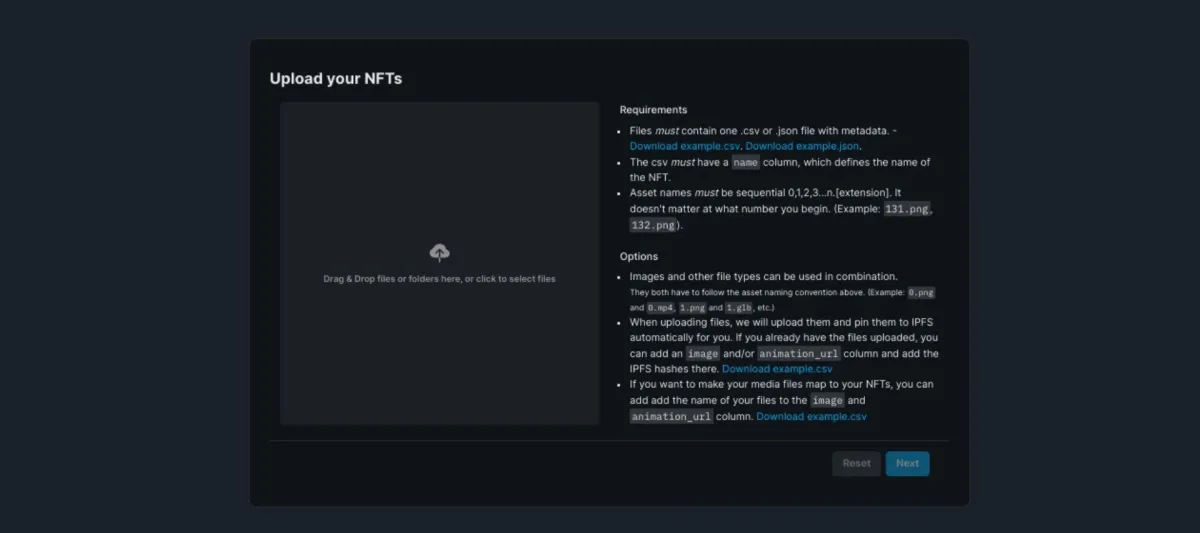
Make sure you follow the formatting guidelines or the metadata might look off.
So I just select all the json and png files…
Then Click Next
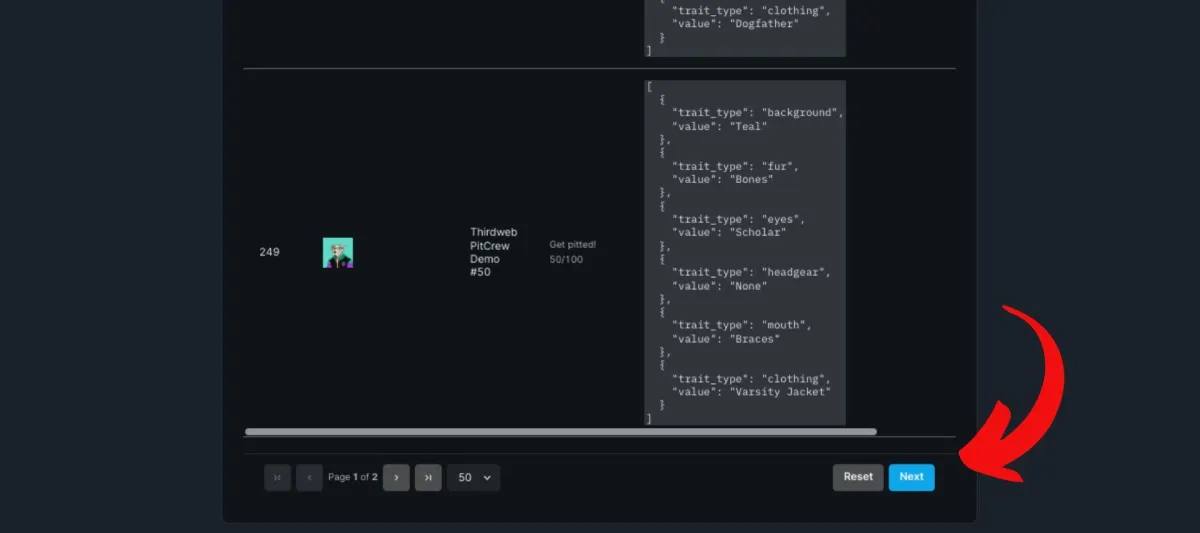
Double check and make sure the images and meta data look correct (and match!)
Now we have the option to reveal these NFTs upon mint, this way collectors can immediately see their NFTs after purchasing.. Or you choose to do a delayed reveal where you’ll need to enter a password to reveal the NFTs at a later time.
But we’re just gonna keep it simple and we’re gonna choose reveal upon mint so its visible to collectors, right after purchase.
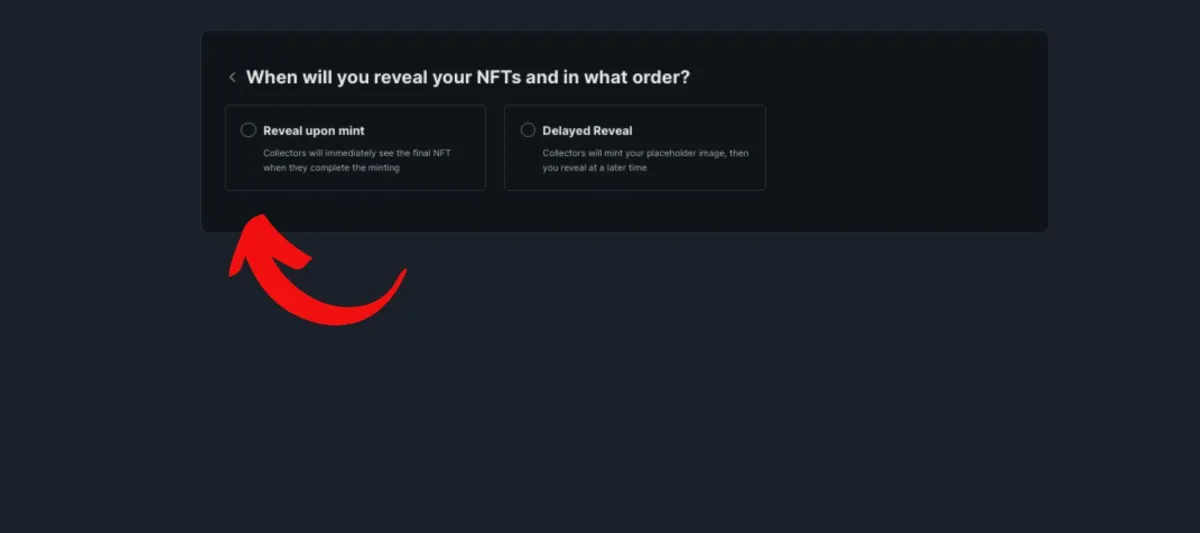
Thirdweb lets you do a delayed reveal where the NFT artwork isn't revealed until a certain time after minting.
Now we are ready to launch…
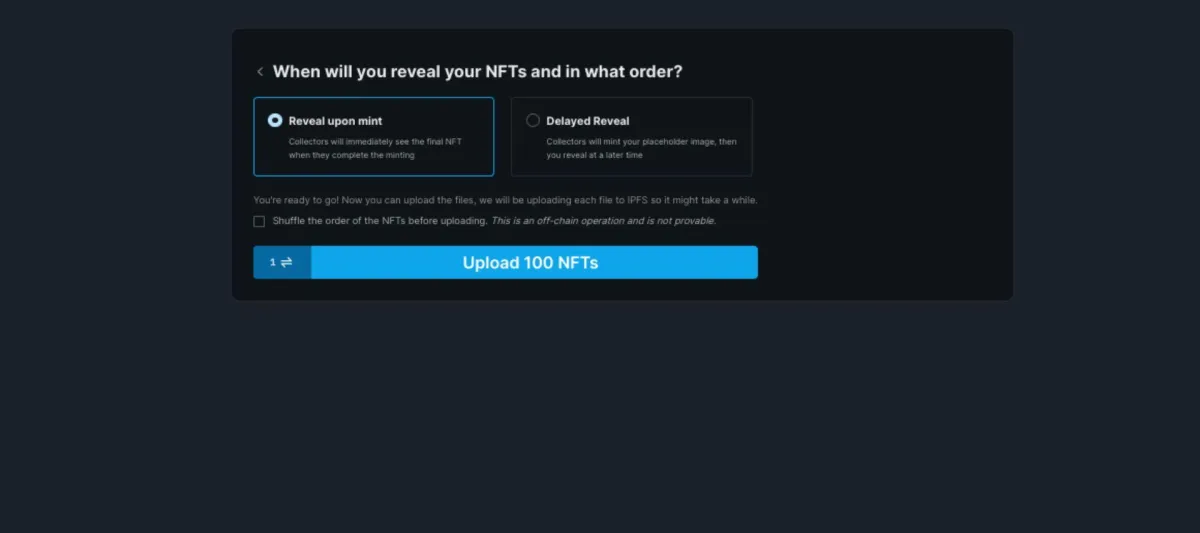
When you're ready, upload your NFTs.
Then pay the gas fee to complete the transaction and wait awhile while the files get uploaded to IPFS.
The process is the same for a 10,000 piece collection, I just did 100 for the demonstration, just takes longer to upload.
IPFS stands for InterPlantetary File System which is a peer to peer file system made with content in mind.
Basically it’s a more efficient way to distribute content over large networks though some criticize it is not decentralized enough but I think it serves its purpose.
Next you will have to approve the transaction in your metamask wallet.
And once the transaction is confirmed successful… congratulations, you’ve just uploaded to your first NFT collection.
Now for my favorite feature about Third web…
Other marketplaces have made it easy to launch an NFT collection and have it appear in their marketplace but getting an actual mint button on your website was often a challenge without a developer…
But that is no longer an issue…
In Thirdweb, you can go to the Embed tab and copy that iframe code.
You can paste this code directly into a custom code widget in your website builder and….
Voila! A button to connect a wallet and mint your NFTs at the price and in currency you specified.
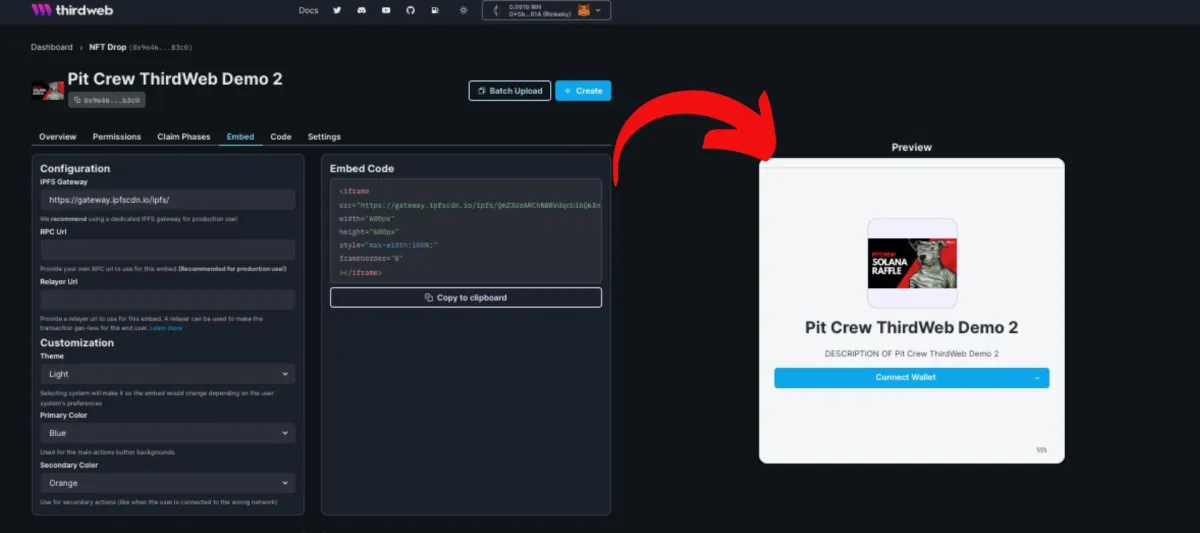
Just copy & paste the embed code to your website.
Now that you know how to create an NFT collection without code.
And you can get a mint button on your website to sell your NFTs, the next step is to get your NFTs in front of your following.
Check out this next video to learn how to build your NFT following starting from zero.
© 2022 blokstreet | All Rights Reserved
blokstreet.com is not a registered investment, legal or tax advisor or a broker/dealer. All investment / financial opinions expressed by blokstreet.com are from the personal research and experience of the owner of the site and are intended as educational material. Although best efforts are made to ensure that all information is accurate and up to date, occasionally unintended errors or misprints may occur.
© blokstreet.com - All rights reserved. Do not share, copy, reproduce or sell any part of this document unless you have written permission from blokstreet.com. All infringements will be prosecuted. If you are the personal owner of the blokstreet.com End User License then you may use it for your own use but not for any other purpose.